Field Types / Common options
Note: You are currently reading the documentation for Bolt 3.7. Looking for the documentation for Bolt 5.2 instead?
All fields have few common options to further customize them. We explain them in more detail below.
| Option | Description |
|---|---|
label |
If omitted, the name of the field will be used as a label in the edit-screen. Replace 'Foo' with the desired label of the field. |
group |
Group the field under a certain tab when editing. |
prefix |
Text/HTML to show before the field. |
postfix |
Text/HTML to show after the field. |
separator |
Insert <hr> after the field. |
info |
Use for displaying extra information about the field in a info popup besides the label. |
default |
The default value for a field, if applicable. |
required |
make this field required so that the record cannot be saved without it being filled. |
pattern |
Add a custom validation pattern to validate against when saving. |
readonly |
Do not allow an editor to change the value of this field. |
index |
Add a database index for this field, only add if you know what this means. |
class |
Add a CSS selector to the field element. |
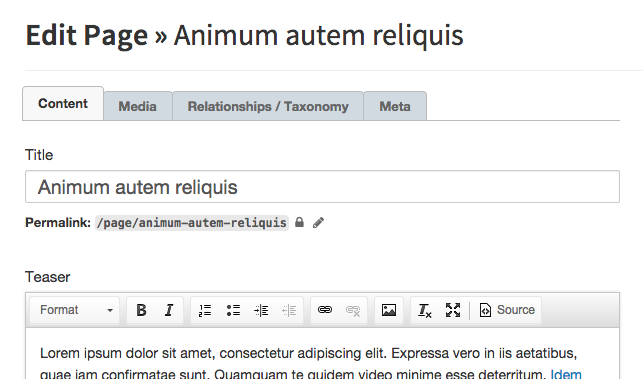
Grouping fields in tabs
If you have a number of fields in your ContentType, it might be convenient to add grouping to the fields, by using tabs. It will look like this:
To do this, simply add group to the fields that you would like to place under
a certain tab. You don't need to specify all of the fields with a grouping,
just the ones that are the first on a tab. Any subsequent fields without a
specified group will fall under the previously set grouping.
For example:
pages:
    name: Pages
    singular_name: Page
    fields:
        title:
            type: text
            class: large
            group: content
        slug:
            type: slug
            uses: title
        body:
            type: html
        image:
            type: image
            group: media
        file:
            type: file
        ..
Prefix and Postfix
Sometimes it can be beneficial to add some extra text, labels or other markup
to how a field is displayed in the Bolt backend, when editing a record. You can
use the optional prefix and postfix values to add some markup before or
after a field. For example:
        subtitle:
            type: text
            class: large
            prefix: "<p>Add a subtitle, if you want.</p>"
            postfix: "<hr>"
As you can see, using postfix: "<hr>" gives a simple and effective way of
adding a divider in the edit screen.
You can set the field option separator : true to make Bolt insert an <hr>-tag
after the field.
Because the prefix & postfix values are parsed as markdown, you can insert
basic markup like links, e.g. [Bolt](https://bolt.cm), or font style, e.g.
*strong* _underline_.
Info
In the case where you want to provide a large volume of informational text
about the use and purpose of a field, the value of the info parameter can be
used.
The info parameter will place a button beside the field label that, when hovered over, will display a popup with the info text.
For fields that have an info button by default (e.g. image field), the info
description will override that field type default.
Default values
When you want to give a record a default value, use default:. For most fields
this will set the initial value of the field, when you're creating a new record
of this ContentType. For date and datetime fields, the value is passed
through strtotime, meaning
that you can use a fixed date as default, like "1900-01-01 12:00:00", but also
relative dates like "first day of this month", "next Monday" or "yesterday".
For select fields, you can use one of the values that you define. For example:
    colors:
        type: select
        values: [ red, green, blue ]
        default: green
If your select field is using a list of records from another ContentType as its values, and you want to define a default, you will need to use the ID of the record that you want to set as the default.
Required and patterns
You can use the required option to make a field required. Combine it with the
pattern option to make sure that a field contains an email-address, or that a
title is no longer than a certain amount of characters. Note that the
requirements are only enforced in the browser, so don't "trust" any data that's
been entered by an editor. When a field does not validate, a default message is
shown that, "the x field is required or needs to match a pattern". You can
set a custom error message for a field with the error option. for example
error: "The title field is required and must be no longer than 40 characters"
Currently, you can use the required option for fields of type text,
textarea, html, date, datetime, float and integer.
For example, to make a title required, you can do this:
        title:
            type: text
            prefix: "<p>A title is required.</p>"
            required: true
            class: large
If combined with a pattern, you can add frontend validation to the field. By
doing this, you can require that the values of a field are within certain
parameters. You can use either one of the predetermined patterns like email
or url, or any regular expression. Currently, the pattern option is only
available for text fields. Examples of patterns that can be used, can be
found on the website html5pattern.com. Some common
use-cases are:
| Pattern | Description |
|---|---|
email |
the input must be a valid email address. The email address must be possible syntactically, but it's not required that it actually exists. |
url |
the input must be a valid url, starting with http:// or https://. The URL address must be possible syntactically, but it's not required that it actually exists. |
^.{1,50}$ |
The input can contain any character, and should be between 1 and 50 characters in length. |
^[0-9_ -]*$ |
The input can contain numbers, dashes, underscores and spaces. |
^[a-zA-Z0-9 ]{10,20}$ |
The input can contain uppercase and lowercase letters and numbers, and should be between 10 and 20 characters in length. |
^[1-9][0-9]{3}[\s]?[A-Za-z]{2}$ |
The input should be a Dutch postal code: four numbers with no leading '0', an optional space, and two letters. 1234 ab or 2518HL are valid inputs. |
For example, use this to make sure a title is no longer than 80 characters:
        title:
            type: text
            prefix: "<p>A title is required. The maximum length is 80 characters</p>"
            required: true
            pattern: "^.{1,80}$"
            class: large
The ^ and $ in some of the examples note the beginning and end of the value
respectively. If we would omit these, the results would be off. For example,
.{1,10} would match any value that has "between 1 and 10 characters" in it,
regardless of what comes before or after it. Probably not what you're looking
for.
Note: You should not try to use a pattern to
match an email address. Always use email to validate an email
address.
You can also define fields that are not required, but that do have a pattern. Doing this, the field can be left blank, but if it is filled, it must match the pattern. For example, you could make an optional email-address like this:
        person:
            type: text
            prefix: "<p>An optional email address.</p>"
            required: false
            pattern: email
Note: If you have a required field, you should always include a postfix. Otherwise the editor might not know what's expected of them.
Readonly fields
You can use the readonly option to lock the content in a field. For example
if you have generated some entries with an import that users should not change.
You can combine it with the default option to make sure that a field contains
something. The readonly status is only enforced in the browser, so don't
"trust" any data that's been entered by an editor.
        serialnumber:
            type: text
            default: "SN-123456789"
readonly: trueCouldn't find what you were looking for? We are happy to help you in the forum, on Slack or on Github.