Extending / Basics / Testing and debugging
Note: You are currently reading the documentation for Bolt 3.7. Looking for the documentation for Bolt 5.2 instead?
It's essential that by the time you submit your extension to the Bolt Marketplace you have tested your extension as thoroughly as possible. To help you do this we've put together some suggested workflows that will help you to both get started, develop and then deploy your extension.
Starting a new Extension Project
The easiest way to get started is by using our skeleton extension project. You'll find the instructions here.
Testing locally
There are a few strategies available to test your extensions while you are developing, in the early stages you will want speed so your edits are visible immediately, as your extension nears completion you will want to simulate the process that your end users will use to install and use your extension.
Phase 1 - Develop your extension within a Bolt project
This is the fastest way to get started, in any Bolt site you can put local
extensions within extensions/local/{author_name}/{extension_name} for the
details see the how-to article.
In this phase you can edit the extension files directly and the changes will immediately take effect in your Bolt application.
Phase 2 - Moving to a Composer Package
Bolt Extensions submitted to the marketplace need to install as Composer packages so once you are ready to move into the testing phase you will need to get your extension into this format. This is also an ideal time to set it up as a Git repository if it isn't already.
The goal now is to have a directory on your local machine that is a valid Git
repo and contains your composer.json, init.php and other extension files.
Once you have that you can now simulate the Marketplace install but from your
local folder. Within the Bolt application that you want to test it, open up
extensions/composer.json
Next you want to add an additional repository to the repositories section of
extensions/composer.json
Something similar to:
        "myrepo": {
            "type": "git",
            "url": "/home/user/git/myext"
        }
The end result looking something like this
{
    "require": {
        "authorname/extensionname": "dev-master"
    },
    "repositories": {
        "myrepo": {
            "type": "git",
            "url": "/home/user/git/myext"
        },
        "bolt": {
            "type": "composer",
            "url": "https://market.bolt.cm/satis/"
        },
        "packagist": false
    },
    "provide": {
        "bolt/bolt": "3.7.0"
    },
    "scripts": {
        "post-package-install": "Bolt\\Composer\\ExtensionInstaller::handle",
        "post-package-update": "Bolt\\Composer\\ExtensionInstaller::handle"
    },
    "extra": {
        "bolt-web-path": ".././"
    },
    "minimum-stability": "dev",
    "prefer-stable": true,
    "autoload": {
        "files": [
            "installer.php"
        ]
    }
}
In the require section above you then need to change the
authorname/extensionname to be exactly the same as the name in your
Extensions's composer.json file.
Once this is done you can now use the normal Bolt interface to install your extension. Visit the Extend Bolt page in the backend and use the install all packages button. You can now make sure that everything still works as it should. If it does then you are ready to move to the Bolt Extensions marketplace.
Phase 3 - Moving to the Bolt Marketplace
Assuming your local Git repository test was successful we can now start the publishing process. Firstly you'll need to publish your Git repository so it's publicly readable online. If you have a GitHub or Bitbucket account then those are ideal places to push to.
Once you have a public url for the Git repository then you can submit your extension to the Bolt Marketplace. To do so visit market.bolt.cm, sign up for an account if you need to and then submit your extension.
If everything looks OK at this point you will be able to see your extension listed on the marketplace.
Approved Builds and Stable Versions
You may have noticed when installing extensions that there are a couple of indicators for users as to the stability of extensions. Firstly on install you will see a list of stable and development versions. It will look similar to the screen below.
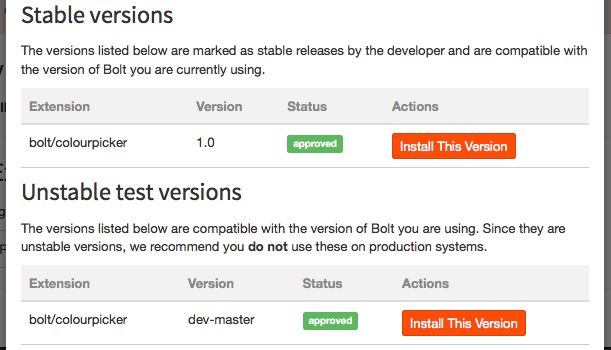
Users will normally only want to install stable versions, and the way you ensure you have listed stable versions is to push a tagged version to your Git repository. If your extension is stable enough to release then this is as simple as using the following commands:
git tag 1.0
git push --tags
You should ensure that you have thoroughly tested each released version, we'd recommend following semantic version numbers for your releases.
You'll also notice that there's a green badge on the screen above for status 'approved'. To get this badge, you'll need to run a test after you've logged into the Marketplace site. If you visit your profile page and click the view button you should see a screen similar to the one below:
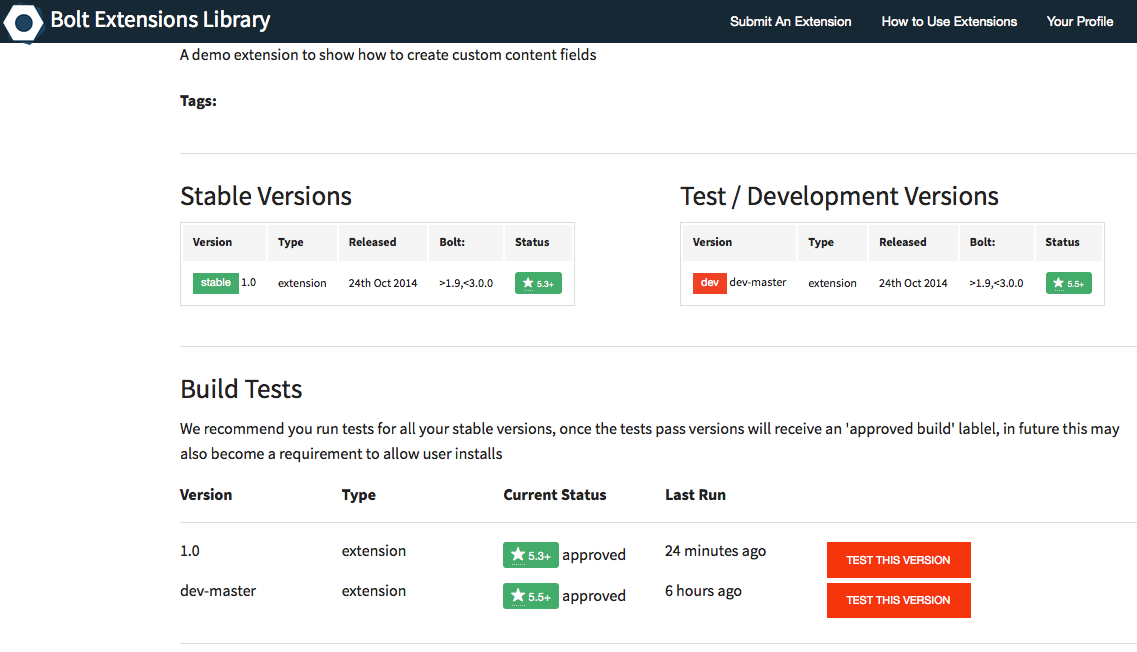
Next to each version of the extension you will see a button to run a test. After clicking on this if all is well you should see a screen like the one below:
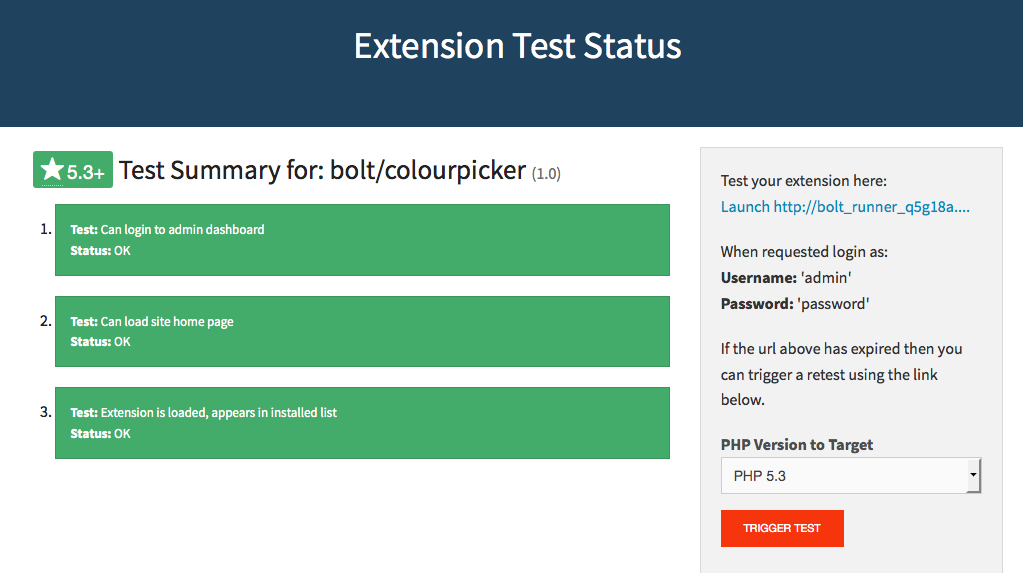
If everything installs ok you should see all green status bars on the screen and the green star badge next to your extension. For complete testing you can launch a test on various versions of PHP to make sure your extensions works well on older versions. Wherever possible we recommend testing against PHP 5.5 since this is the same minimum version supported by Bolt and gives you access to most users.
Once you have a successful test you will receive the green approved build badge on the extensions install window.
Couldn't find what you were looking for? We are happy to help you in the forum, on Slack or on Github.